
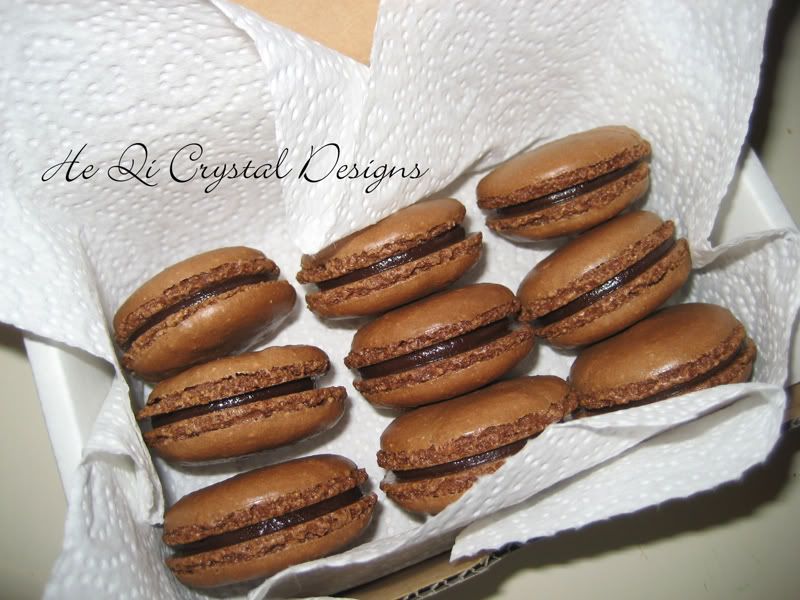
If you've been following my blog for a while, you'll know I have a slight obsession with these adorable sweets.
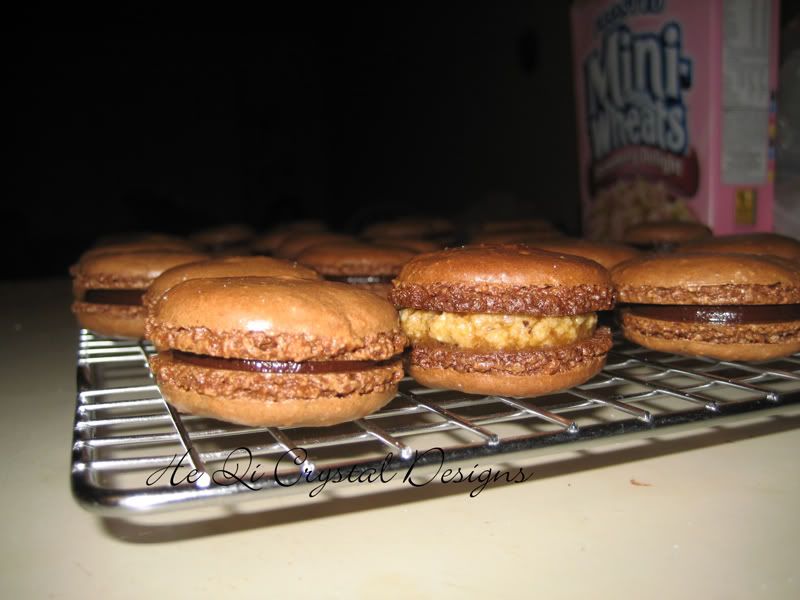
This is a shot of part of a batch I cooked today:
Chocolate macarons with Earl Grey infused dark chocolate ganache filling.
They're basically almond- meringue sandwich cookies with your choice of filling.
The outer shell is hard, smooth, glossy and slightly crunchy, and when you bite into it, it has a texture very similar to a brownie, soft and a bit chewy.
Macarons are known for their adorable appearance, and notorious for their difficulty to produce. It takes a lot of experimentation and failure to create the perfect macaron in your home kitchen, but I think I've found a pretty stable recipe to start you guys off, in case you're interested in making your own. The ingredients are simple, but the technique involved takes some practice to master. They're also pricier to make than your average chocolate chip cookie, so just keep that in mind. Be prepared to spend some money if you want to become successful at making macarons.
General note: There are LOTS of resources online for making macarons-- I think they're starting to become more popular in the US as more and more food bloggers begin to rave about them. If you want more details regarding a certain step, I recommend googling or youtubing, because I am not expert! I'm only sharing what I know from my personal experience, and I am no chef :) Also keep in mind that this is what I consider to be my most stable recipe-- perhaps it may not work for you due to your location's temperature, differences in oven, etc.
Chocolate Macaron Shell Recipe:
[Using French meringue method]
Ingredients:
1. 3 large egg whites, aged for 3 days
- Separate from yolks, keep egg whites lightly covered w/foil, store at room temperature for 3 days. This does NOT "rot" the eggs. Google "aging egg whites" if you're worried about safety or want to look more into this.
2. 2/3 cup almond meal
- You can use store bought almost meal (just ground up almonds, really fine), or grind your own in the food processor. I recommend buying them, its just easier and the texture is much more uniform and fine when you do it this way. You can find almond meal at Walmart right above the flour-- it's about $10/pack, and 1 pack can make about 3 batches.
3. 3 Tbs. unsweetened cocoa powder-- find some at your local super market
4. 1/4 tsp iodized salt
5. 3 Tbs granulated sugar (regular sugar)
6. 1 & 1/2 cups powdered sugar (you can reduce if you want them to be less sweet, I use about 1.25 cups)
7. A pinch of cream of tar tar
Directions:
- Combine almond meal, powdered sugar and cocoa, either whisk REALLY well, or sift everything together. The idea is to get these dry ingredients really well mixed. Set aside.
- Start whisking your aged egg whites in a STAINLESS STEEL BOWL. I read somewhere that this was important, but totally forgot why, sorry :(. When they begin to get frothy, start adding your 3 Tbs of granulated sugar steadily as you're still whisking. Then add your salt and a pinch of cream of tar tar. Whisk until you get glossy, puffy, stiff peaks. Resist the urge to overwhip your egg white-- you'll know you've overwhipped when your egg whites start deflating and starts getting really thick. I think this is one of the trickiest parts!
- Fold in your sifted/mixed dry ingredients in 3 batches. Add 1/3 of dry ingredients to your fluffy egg white, FOLD about 10 times, add the next 1/3, fold 10 times, then add the final 1/3, and fold up to 30-35 more strokes. The key is to keep the folding low so that you don't end up deflating the egg whites. Around 50 strokes is good. If you want more info regarding the folding technique, please consult Youtube. Your final mixture should be pretty thick but even, and flows like lava. When you draw a line in the batter, it should disappear in about 10-15 seconds.
- Put half the batch into a piping bag, and pipe 1-1.5 inch circles onto a silpat mat (preferred, for better circles that retain its shape), or parchment paper. Repeat until you've used up all your batter. Keep them 2 inches part, because your mixture will spread!
- Let your piped circles sit on a flat surface for about an hour to 1.5 hours. They should develop a "skin" on the outside, and this will "rise" during baking, which causes the "feet" to protrude. Touch them very gently before baking to check if they're ready: if your finger doesn't leave a mark, then it's okay to bake. If not, let it sit out for longer.
- Bake at 350 degrees F for 10-14 minutes. Keep your oven door ajar with a wooden spoon while baking.
- Remove and let cool. They should pop off relatively easily from the baking sheets when they've cooled.
- Match up the shells and fill with your choice of filling =)
The bottoms should be FLAT and not stick to the baking sheet:
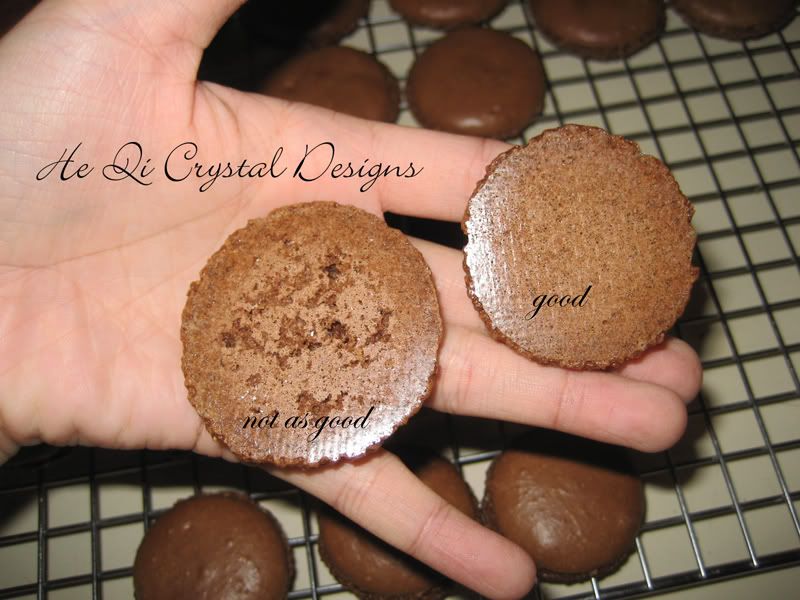
^ This is how you know when you've done them right.
Just remember, macaron making is a trial-error process, it takes a lot of patience, so don't fret if you don't get it your first couple of tries!
Additional notes:
- There are various other method of macaron shell makings available, some of which include heating simple syrup before adding to egg whites, but I'm lazy so I skip that part. I heard that the heated method (Italian Meringue) produces a more stable meringue, so you will probably end up with more attractive macarons with more prominent "feet" on the bottom.
- Keeping the oven door ajar with a wooden spoon does wonders and I really have no idea why. My guess is that it helps air to circulate so your macarons are baked more evenly.
- As tempting as it is to eat your macarons right away, RESIST. They are meant to be stored in the fridge for about a day, and then "thawed" to room temperature for about 30 min prior to serving. They'll be well "rested" by then, and any air bubbles formed between the upper shell and lower feet will have gone away due to expansion of the batter which has sucked up the moisture of the filling.
Making the filling:
There are endless possibilities for making macaron fillings! You can use chocolate ganache, and kind of buttercream, frosting, fruit preserve, jam.. whatever you want, really! Caramel :P
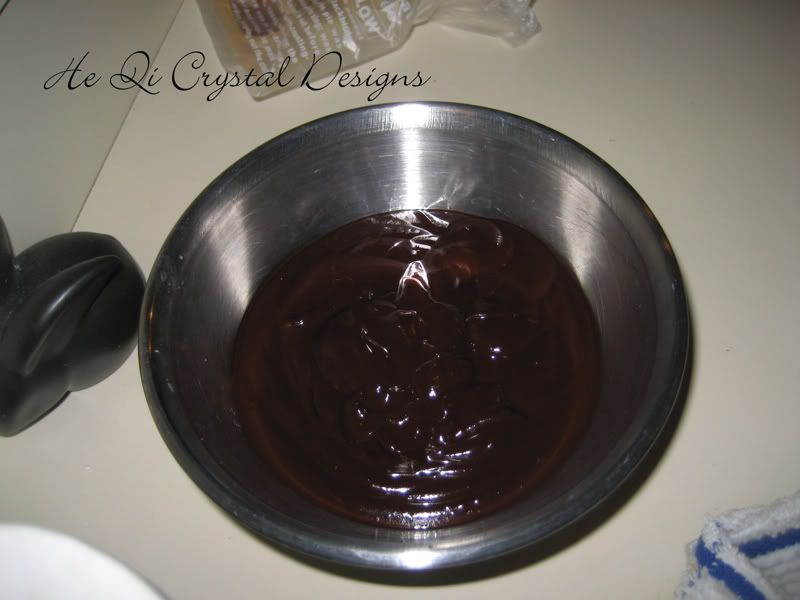
For mine, I used an early grey tea infused chocolate ganache.
Ingredients: your choice of chocolate, earl grey tea bags (1-2, to taste), heavy whipping cream, unsalted butter
> Using a double boiler method, I heated 1/3 cup heavy whipping cream and contents of an earl grey tea bag over medium heat until cream was almost boiling. I removed it from heat, and added chocolate chips (I like my ganache thick, so I added the whole 16oz package, but you can probably use 1/2 - 3/4 of the package) and butter, mixed till smooth, stuck it in the fridge till I was ready to use it. This stuff stores pretty well, so I just froze whatever I had left that I didn't use up.
More Macaron info, all sources I've consulted and found useful if you're interested in learning more:
Tartlette
The recipe I first started with: Choco EG macarons
Bakerella
Man, I wish I'd taken a photo of every step, but I got so into it that I forgot, sorry :( NEXT TIME!!!
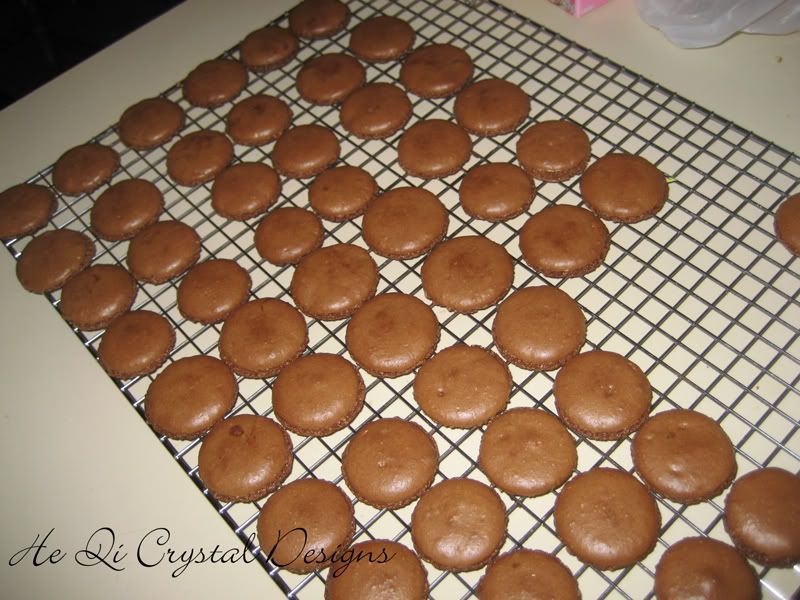
Baked shells:
A better shot of the "feet"

mmmm ganache..
Half filled!

Filled up:
The lumpy looking filling is a failed coffee buttercream, pls ignore :)
Just for kicks, I accidentally burned my last mini batch, oops!

Have fun, let me know if you choose to bake macarons! And tell me about your experience!
Let me know if you have crucial burning questions, and I'll try to answer them for your on my next entry!
Also, I'm taking requests for making macarons! I'm going to be charging a small fee (not $2/macaron, more like just shipping charge + raw materials charge) if you want me to make some for you! Just drop me a line: heqicrystaldesigns@hotmail.com
If I know you and have your address, you'll probably be getting some of these babies in the mail around Christmas ;). Do let me know if you have any food allergies!
Hope you've enjoyed this post =)
I'm heading off to Oregon for the next 4 days, so I won't be blogging.
However, I'll be adding a CYBER MONDAY section to my shop for super deals, so remember to come back for that next Monday!
love,
Lisa
heqicrystaldesigns@hotmail.com
SHOP HE QI
11 comments:
I've been wanting to try macarons for so long! I've seen people blog and reblog pictures of these things daily. Blair Waldorf was also munching on them during a recent episode of Gossip Girl, haha.
Your macarons look so scrumptious! I definitely need to hit up a French bakery when I go home this weekend.
You're so multi-talented, Lisa! <3
holy moly those looks so good!! I haven't been able to get macarons out of my mind since you introduced me to that etsy site X.x I don't think I have the guts to make my own though...I'm too impatient...I just want to eat them ^_^
You look like you have it down to a fine art though - yours look storebought cuz they're so finely shaped ^^
Wow, that looks AMAZING!
Looks so delicious and they are so perfectly put together. Great job!
Thanks for sharing your recipe! The macarons that you make look perfect and utterly delish =D
have fun at Oregon :) they look delicious :D
ahh! look so good yet... looks like for a pro to make. lol. I remember the first batched you made, which was good but I think you're getting better and better... look perfect now! Thanks for the recipe.
I've never tried macarons before.. I must try it one day ^^ looks scrumptious
oh wow! I've never had one before, though I see them a lot in pastel colors, these look so yummy!
looks delicious. I'll try out the recipe. But I suck at cooking. not joking either.
These macarons look sooooo good! So many steps, though...I think it just might be easier to pick one up from the bakery the next time I'm there!
Post a Comment